The use of epoxy full-flake seamless flooring over existing tiles is a common inquiry due to the desire for a cost-effective, efficient, and cleaner alternative to replacing the entire tile floor.
Many people wish to avoid the inconvenience and mess of tile removal and wonder if applying epoxy paint directly over the tiles is a viable solution. As tiled floors are already prevalent, customers are eager to find a seamless transition without requiring extensive renovations. Unfortunately, removing tiles can be a laborious and time-consuming task, not to mention the potential expenses involved in raising the floor afterwards by a significant amount.
Fortunately, excellent products are now available that facilitate tile restoration on various surfaces. However, while applying epoxies over floor tiles is generally possible, it is crucial to consider certain conditions and factors before proceeding. Contractors and professionals know this, and individuals need to be well informed. Here are a few points to consider before making a decision.
Are All Tiled Floors Resurfaceable?
Achieving successful epoxy full flake seamless flooring adhesion to existing tiles relies on two critical factors. Firstly, the condition of the tiles is crucial. It is essential to ensure the tiles are in good shape and remain securely in place without any movement. If you are confident that the tiles are stable and won't shift or loosen, you can proceed with the epoxy application. However, if the tiles are loose or produce a hollow sound when tapped (indicating they are "dummies"), there is a risk that they may lift in the future. This lifting can lead to cracking or detachment of the epoxy coating.
If your tiles are loose or damaged, they must be repaired before applying the epoxy. Proper tile repair and stabilization are essential to create a stable foundation for the epoxy flooring and ensure long-lasting results.
Adhesion of the Epoxy over Tiles
The glazing coat present on tile surfaces can pose a challenge to the proper adhesion of the epoxy. It is important to note that epoxy may not adhere effectively to the glazing. To overcome this issue, it is recommended to sand and grind the tile surface until the glazing is removed. The goal is to create a rough and scratched surface, providing better bonding for the epoxy.
Additionally, applying a low-viscosity epoxy primer after preparing the tile surface is advisable. This primer is specifically designed to penetrate the tile surface, enhancing the adhesion of the subsequent epoxy layers. In addition, the primer helps to create a strong bond between the epoxy and the tile, ensuring a more durable and long-lasting finish.
Sticking to Tiles
When applying a coating or material over a tiled floor, the primary concern is ensuring proper adhesion to both the tile and the concrete substrate.
Certain floor tiles have a glossy finish due to the glazing process, making it challenging for substances to adhere effectively. In such cases, it is necessary to remove the gloss by grinding the surface, allowing the epoxy to stick properly. Acid-based etchers can be used to micro-etch the surface, but the effectiveness of this preparation method can vary. In addition, vitrified tiles, which are non-porous and extremely hard, may require more than grinding to achieve a strong bond. In most cases, a professional primer is necessary to ensure proper adhesion.
Sealed tiles can also pose difficulties, as the sealant can create a glossy appearance. Even unglazed terracotta tiles may be sealed to prevent staining or soiling. If the tiles have been sealed, grinding is still required since sealers often repel water and can hinder the bonding process if not properly prepared.
Attention should also be given to the condition of the grout lines and the overall tile surface. Contamination is a major concern, as grout is porous and can absorb grease and dirt, making it challenging for the epoxy to adhere. In environments like commercial kitchens with high oil content, removing the grout lines or even the entire tiled floor may be necessary to ensure proper adhesion.
Another important consideration is the quality of the bond between the floor tile and the concrete substrate. Over time, tiles can become "dummies," indicating a weak floor. If multiple tiles are loose, cracked, or broken during grinding, removing them and working directly on the underlying concrete is advisable for a more secure and reliable result.
Switching to Epoxy Over Tiles
Before proceeding with the transition, it is important to prepare your floor properly. Suppose the floor is stable and in good condition. In that case, the initial focus should be on ensuring the adhesion of the epoxy to the existing tiles for a durable and effective outcome.
Begin by examining the tiles on your floor. If the tiles feel rough and unglazed, thoroughly cleaning with soap and water and drying should suffice.
You can also clean the grout lines and remove any accumulated dirt if necessary. However, additional preparation steps are required if your existing floor has glazed tiles.
To facilitate proper bonding, lightly sanding the tiles will eliminate the gloss and create a rougher surface. This allows the epoxy to adhere more effectively. It's worth noting that the glossy finish may be due to a sealer applied to the tiles to prevent them from appearing dirty. In such cases, grinding off the sealers is necessary for optimal results.
Why Should Epoxy Resin Be Used on Tiles?
Every home or apartment will need to undergo major renovations at some point, and one of the most common tasks is installing new flooring. Removing the existing flooring and replacing it with the new one is a standard procedure.
However, breaking and removing old tiles can be tough, especially in the bathroom, where they have been in place for a long time. With tiles as ugly and out of style as those from the 1970s, patience is typically not an option. In such a scenario, it would be ideal to have a brand-new design and a waterproof and impermeable floor coating.
Epoxy resin is a highly adaptable substance with a wide range of potential uses. Its high degree of design versatility is due to the fact that it can accommodate a wide range of filler materials and colours.
Do You Want Grout Lines or Not?
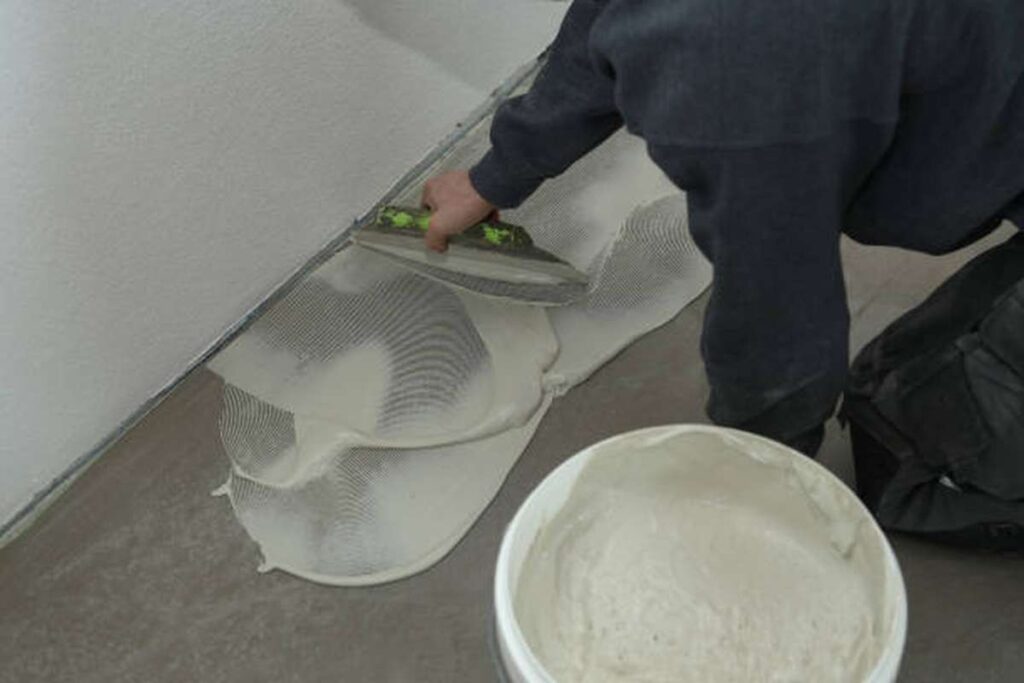
Another important question to ask when considering resurfacing your tiles with epoxy flooring is whether you prefer visible grout lines. If you prefer a seamless look without grout lines, apply a floor levelling compound over the tiles to fill in the grout lines. However, this additional step adds both time and cost to the project, as the materials can be expensive and the process labour-intensive.
However, you may find leaving the grout lines appealing, as they largely disappear once the epoxy and flakes are applied. In addition, the faint outline of the grout lines can add a touch of visual interest to the floor, giving it a unique and textured appearance. Ultimately, deciding whether to fill in the grout lines or leave them visible depends on your preference and the desired aesthetic outcome.
What if the Tiles Crack?
It is important to note that if you discover loose tiles during the preparation process, it is advisable to remove them. When tiles begin to crack while grinding, it indicates a weak bond between the floor tile and the concrete, making the floor unstable and potentially unsafe.
When you encounter loose or damaged tiles or issues during the preparation process, it is always recommended to seek the guidance of a flooring specialist. Consulting a professional with the necessary knowledge and experience can ensure the job is done correctly and safely, providing the best possible outcome for your flooring project.
Applying Epoxy Resin to Tiles
Applying epoxy resin to coat tiles is a relatively straightforward process, with just a few key considerations to remember. We have provided a step-by-step guide for coating your floor with epoxy to assist you.
Preparing the Tiles
It's vital to get rid of anything in the bathroom before applying the epoxy glue to the tiles. Once the region is accessible, substrate preparation can commence. Make sure there is no debris or dust on the floor by giving it a good cleaning. Level the surface by filling any holes, fractures, or gaps using an appropriate filler, such as epoxy filler.
It is also important to clean the flooring thoroughly of any oil, grease, or solvent residues. It is imperative that you do this so that the epoxy flooring fully cures. Finally, it is crucial to let the entire substrate, including the joints (which tend to retain moisture), to dry for several days before adding epoxy resin to the tiles. Likewise, waiting until all of the levelling compound on any repaired portions has dried is required.
Clean the Floor
Before starting the process, ensuring a clean work surface is highly recommended. Begin by sweeping away any loose debris and thoroughly scrubbing the tiles.
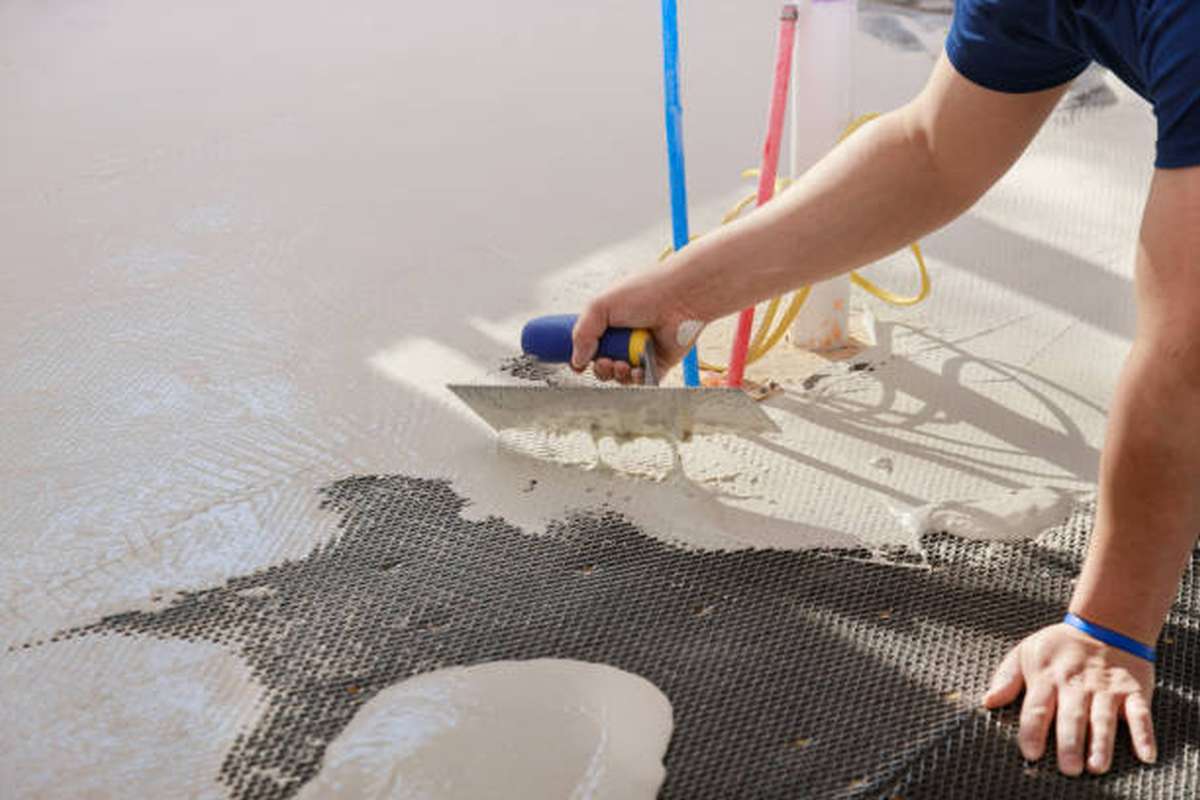
Apply Primer
Applying a primer is crucial for most surfaces to ensure a smooth and even application of the epoxy resin. In addition, the primer helps prevent the epoxy from being absorbed into porous surfaces, resulting in a more uniform and desirable finish.
Help the Epoxy Stick
To ensure proper epoxy adhesion to the tiles, addressing any potential issues with the tile surface is important. For example, if the tiles have a glossy finish or have been sealed, they may not provide an ideal bonding surface for the epoxy.
One effective solution is to roughen the tile surface, which can be achieved by sanding or using an etching compound. This process creates a textured surface allowing the epoxy to adhere more effectively.
However, in some cases, even after roughening the tiles, additional measures may be necessary. For example, applying a layer of floor primer can provide extra adhesion and ensure a strong bond between the epoxy and the tiles. This step helps create a suitable surface for the epoxy application and enhances the overall durability and longevity of the coating.
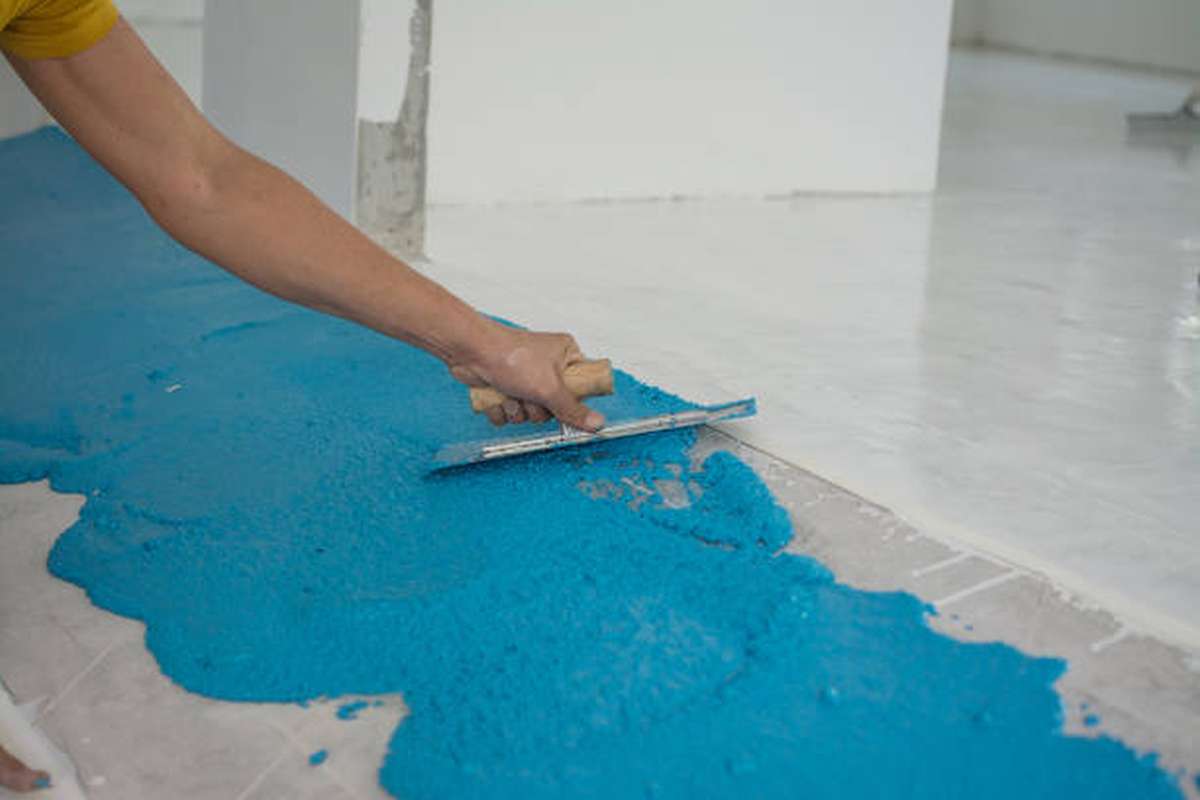
Spread of Decorative Elements
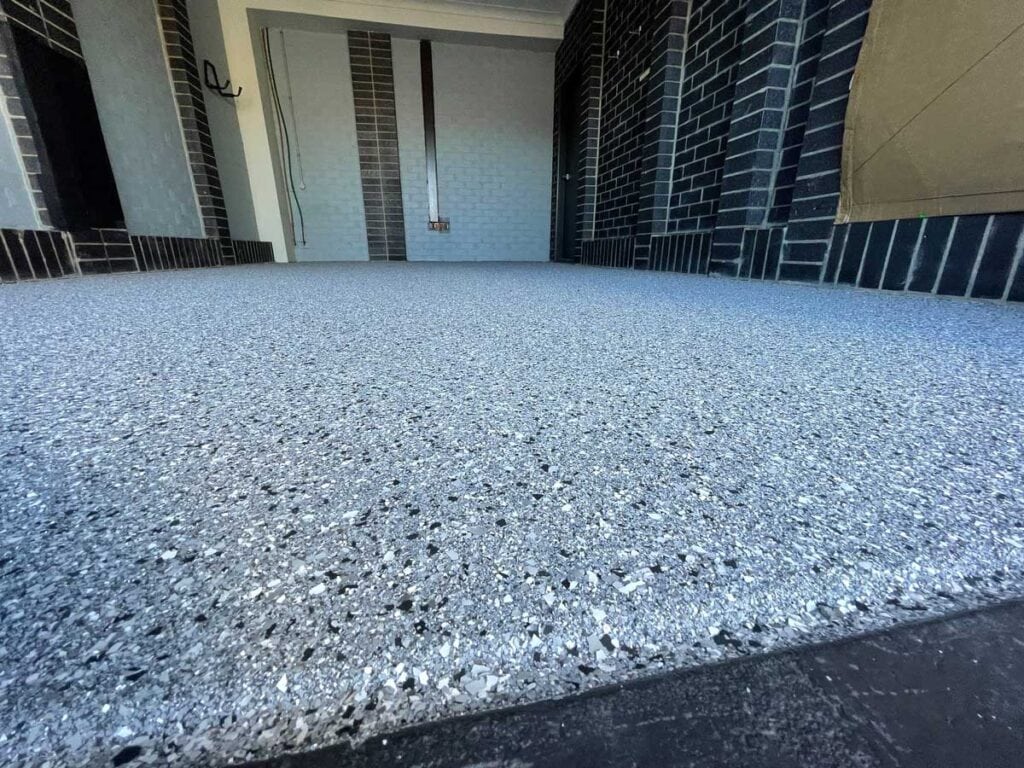
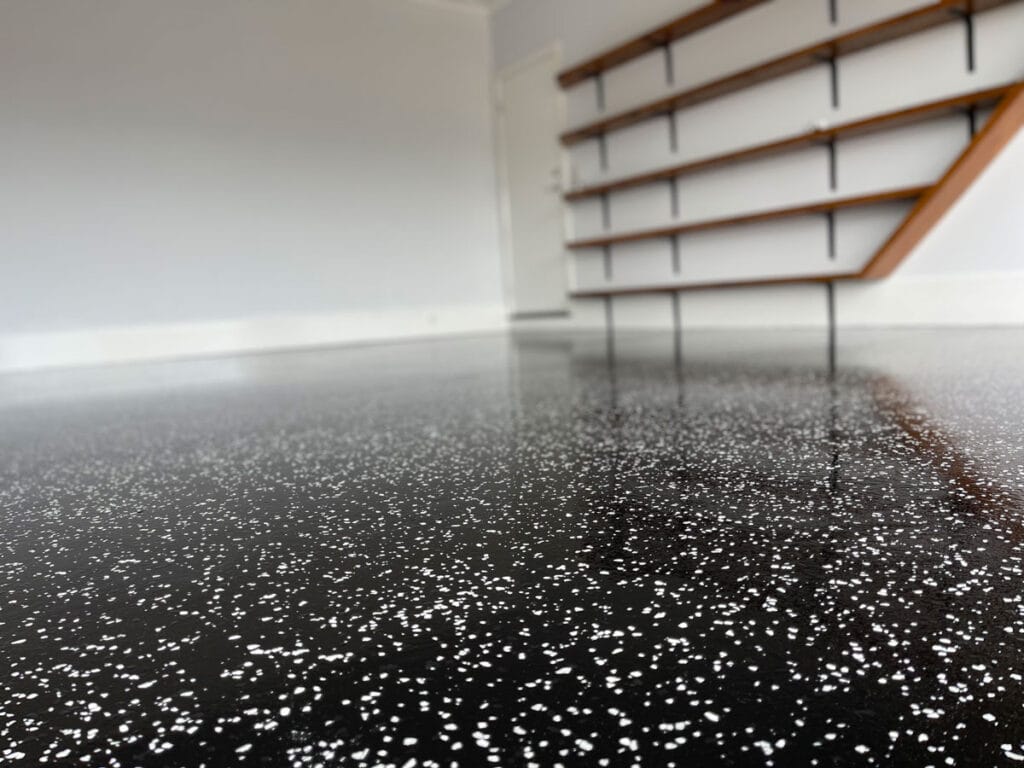
You can incorporate decorative elements such as glitter particles, small stones, flakes, or other accessories to add a unique touch to your floor. This can be done by sprinkling them onto the epoxy coating before it dries.
Doing so allows you to create a visually appealing and customized floor surface that reflects your style and preferences. In addition, the decorative elements will become embedded in the epoxy and provide a distinctive aesthetic effect once the coating is fully cured.
It's important to consider the type and size of the decorative elements you choose, ensuring that they are suitable for use with epoxy resin and won't compromise the durability or functionality of the floor. Additionally, proper application techniques and timing should be followed to achieve the desired result.
Smooth the Floor
To ensure a smooth and even surface for your epoxy coating, it is important to address any height variations between the tiles' tops and the surrounding grout lines. This will help prevent the grout lines from being visible through the epoxy.
There are a couple of options you can consider to achieve this. One option is to sand the tiles to a uniform height, ensuring the entire floor surface is level. This will require careful sanding to avoid damaging the tiles and achieving a consistent height across the floor.
Alternatively, a levelling compound can even out the floor's height. This compound is applied over the tiles and grout lines to create a smooth and level surface. However, before proceeding with this option, it is essential to ensure that there will still be sufficient clearance for your doors to open and close properly once the additional height is added.
Consider the specific requirements of your project and consult with a professional to determine the best approach for achieving a level surface while maintaining proper functionality within your space.
Conclusion
Many people ask about installing epoxy full-flake seamless flooring over their current tiles as a more affordable, time-saving, and hygienic option to ripping up the floor and starting over. However, before moving on, it is crucial to take into account a number of variables and factors. The tiles' condition, the epoxy's ability to stick to the tiles, and the presence or absence of a glazed coating on the tiles' surfaces are all factors. Successful adhesion requires prepping the tile surface by sanding or grinding away the glazing and then applying a low-viscosity epoxy primer. Coatings or materials applied over a tiled floor must adhere well to both the tile and the concrete below it.
Removing the gloss by sanding the surface is important for effective adherence. Professional priming is required to achieve appropriate adhesion while working with sealed tiles, which can potentially provide challenges. Checking the condition of the grout lines and the tile itself is also important. If you want a long-lasting, high-quality result, switching to epoxy instead of tiles is crucial. Epoxy resin is a versatile material suitable for many applications.
When deciding whether to fill in the grout lines or leave them visible when resurfacing tiles with epoxy flooring, this is an important consideration. If the tiles break when you're preparing the area, you should throw them out. Another step in proper maintenance is to clean the grout lines and eliminate any dirt that has settled there. Although there are a few important details to keep in mind, using epoxy resin on tiles is a simple operation. Getting the tiles ready for epoxy resin requires cleaning them thoroughly, levelling the surface, and waiting for the entire substrate (including the joints) to dry for several days.
Remove any clutter from the floor and scrub the tiles until they shine. Priming the tile and then sanding or using an etching chemical to roughen the surface will make it easier for the epoxy resin to adhere. By priming the floor first, you can improve the epoxy coating's adherence, resilience, and lifetime. You can give the floor a one-of-a-kind look by spreading decorative elements like glitter, small stones, flakes, or other decorations. To guarantee an even and smooth surface for the epoxy coating, the floor must be smoothed.
You can either sand the tiles down to the same height all throughout or use a levelling compound. Seek the advice of an expert concerning the optimal method for levelling the surface without compromising its usefulness.
Content Summary
- Epoxy full-flake seamless flooring offers a cost-effective and cleaner alternative to replacing tile floors.
- Applying epoxy paint over existing tiles can avoid the inconvenience and mess of tile removal.
- Removing tiles can be laborious and expensive.
- Successful epoxy adhesion depends on the condition of the tiles.
- Loose or damaged tiles must be repaired before applying the epoxy.
- Glazing on tile surfaces can hinder epoxy adhesion.
- Sanding and grinding the tile surface helps remove glazing and improve bonding.
- Low-viscosity epoxy primer enhances adhesion and creates a durable finish.
- Proper adhesion to both tile and concrete substrate is crucial.
- Glossy and sealed tiles require additional preparation for epoxy adhesion.
- Contaminated grout lines can hinder epoxy bonding.
- A weak bond between tiles and concrete substrate may require working directly on the concrete.
- Preparation is important for a successful transition to epoxy over tiles.
- Rough and unglazed tiles can be cleaned with soap and water.
- Glazed tiles require sanding to create a rougher surface for epoxy adhesion.
- Epoxy resin offers a waterproof and impermeable floor coating.
- Epoxy resin is highly versatile and can accommodate various filler materials and colours.
- Consider whether you want visible grout lines or a seamless look before resurfacing with epoxy.
- Leaving grout lines can add visual interest to the floor.
- Loose tiles indicate a weak bond and should be removed.
- Consult a flooring specialist for guidance on loose or damaged tiles.
- The process of applying epoxy resin to tiles is relatively straightforward.
- Preparation includes cleaning, levelling the surface, and allowing proper drying time.
- Applying a primer is crucial for a smooth and uniform epoxy application.
- Roughening the tile surface improves epoxy adhesion.
- Decorative elements can be added to the epoxy coating for a customised look.
- Smooth out height variations between tiles and grout lines for an even surface.
- Sanding or using a levelling compound can achieve a smooth floor surface.
- Consider door clearance when using a levelling compound.
- Consult with a professional for the best approach to your specific project.
Frequently Asked Questions
Typically, epoxy floors last between 10 and 20 years, much longer than a painted concrete floor, which will chip and wear quickly in high-traffic areas.
When the benefits of a durable epoxy floor are compared to ceramic tile, more often than not, epoxy comes out on top. Durable, low-maintenance, safe, and aesthetically pleasing, epoxy floors sure live up to their name! Lasting for years, this cost-effective option will have you choosing epoxy over tile any day!
Resinous garage floor coatings like epoxy, polyuria, and polyurethane are non-porous, so the surface tends to be extremely smooth. Although this type of surface works fine when dry, it becomes slippery, which can pose a threat by introducing water, oils, or mud.
Certainly! There are two approaches to this process. One process is to install self-levelling concrete over plywood, followed by an epoxy system.
A good epoxy patching kit can replace mortar to speed up this process. If the damage is far more extensive than a handful of minor cracks and chips, you may need to take more extreme measures to repair the flooring. You'll need to resurface the entire area before applying new epoxy.