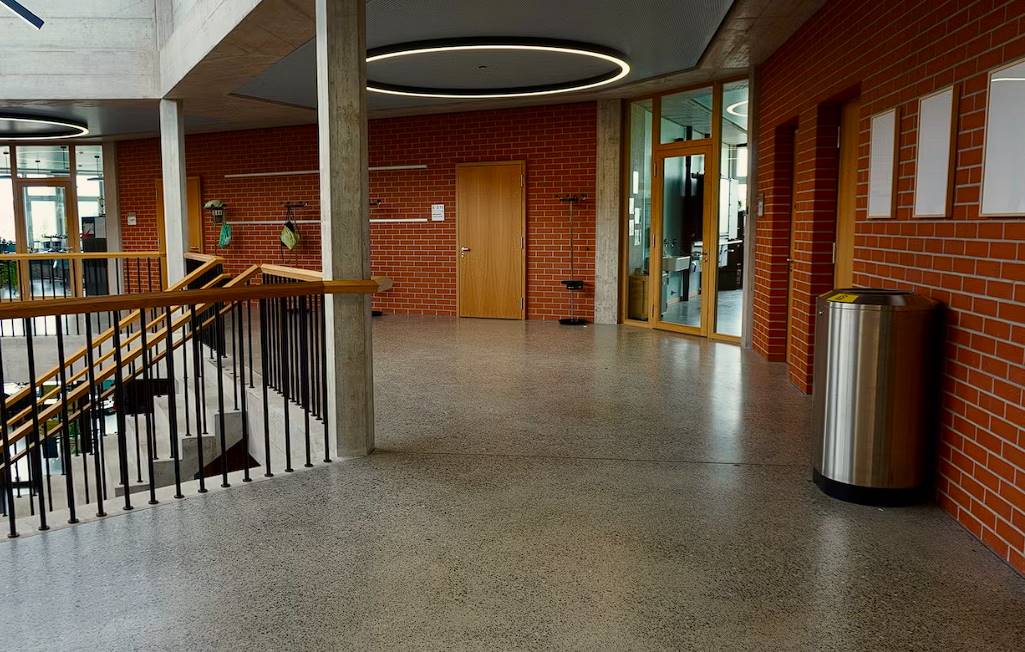
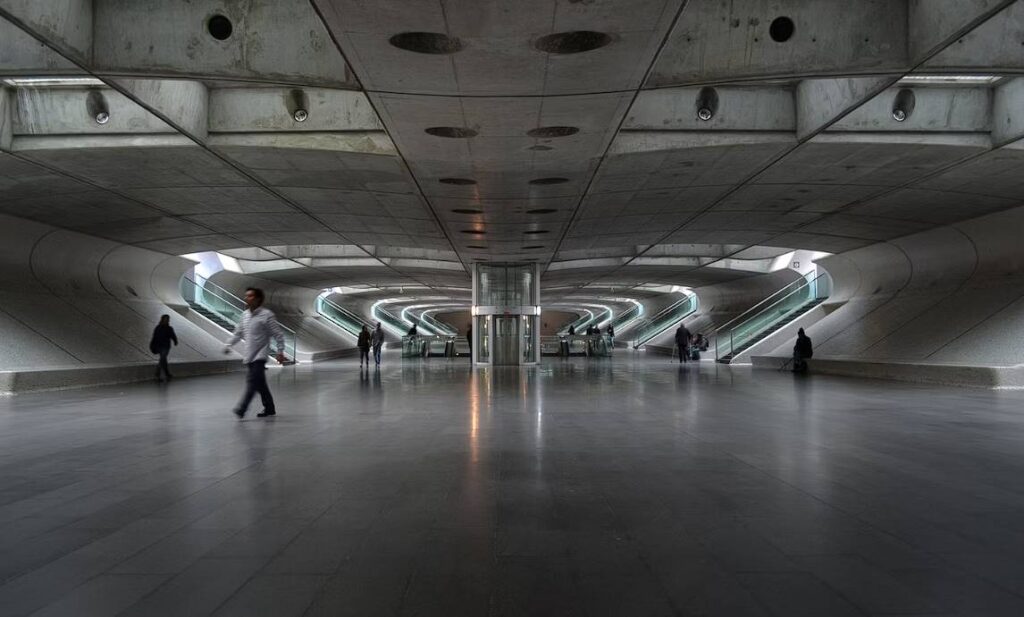
In stores, hotels, and schools, polished concrete floors are becoming more and more popular.
Because polished concrete has many benefits, more places are putting it on their floors. For example, polished concrete is tougher and lasts longer than other flooring options. It also requires less maintenance than other flooring options and lasts much longer.
If you want to install or take care of a polished concrete floor, you should know what it is, how it gets polished, and how to take care of it properly.
Polished concrete is easy to take care of. But if you care for the floor properly, stripping and waxing can make it look good and protect the polish. It also adds work and costs that are optional.
Regarding floor care, many building service contractors (BSCs) and in-house maintenance teams stick to what they know best. Since they are used to stripping and waxing vinyl structure tile (VCT), using the identical method on polished concrete may seem obvious. Waxing and stripping are common ways to clean floors, but there are better ways to clean polished concrete.
Before the concrete cures, it needs to be levelled, floated, and troweled in the right way to get a smooth, shiny finish. Then, when the concrete is dry, and the surface is mostly smooth, you can use mechanical or chemical methods to polish it to a nice, shiny finish.
What Makes Concrete Shine?
Concrete undergoes a transformative process through grinding steps from a rough and dull surface to a polished and shiny one. This grinding is accomplished using diamond-impregnated floor pads that contain countless microscopic diamonds, which effectively grind the concrete and enhance its smoothness.
The grinding process is conducted step-by-step, starting with a low-grit diamond pad and progressing to higher grits until the concrete achieves a brilliant polished shine. In many cases, a chemical hardener is applied during grinding to enhance further the durability and toughness of the finished, polished concrete floor.
To achieve a uniform and smooth concrete finish, it is crucial to ensure proper levelling, troweling, and floating before curing. Once the concrete surface is reasonably smooth and has dried, you can employ chemical or mechanical polishing techniques to achieve the desired glossy and smooth finish.
Knowing the correct equipment and techniques available to achieve the best concrete finish is important. The process can be divided into pre-curing and post-curing steps, each with specific requirements and procedures.
Start with a Smooth and Level Concrete Surface
Before achieving a shiny concrete floor, it is crucial to ensure the surface is smooth. A smooth surface is essential for optimal results regardless of the desired final appearance.
To attain a high-quality surface, it is necessary to perform levelling, floating, and troweling of the concrete before it undergoes curing. These steps are crucial in creating a smooth and even surface. Once the concrete surface is adequately levelled and treated, it must fully cure before the polishing methods are required to achieve the desired glass-like sheen.
Regular Washing with a Soapy Water Solution
To maintain the smoothness and shine of any concrete surface, it is recommended to clean it regularly using a mild soap and water solution.
Please avoid using acidic solutions on the concrete as they can cause damage and rough the surface. The soapy water solution is sufficient for deep cleaning the concrete surface in your home.
This cleaning method effectively removes dust and helps eliminate watermarks and stains. It is important to thoroughly dry the area after cleaning to prevent watermarks from forming on the concrete surface. By consistently using this technique, you can keep the concrete surface looking beautiful.
Make Concrete Shiny by Mechanically Polishing
A mechanical polishing technique can be employed using a hand grinder, such as an angle grinder, although it may not be a tool commonly available at home. However, it can be rented from a hardware store if needed.
This process involves using grinding discs with metal bond diamonds, which are specifically designed for concrete surfaces. These industrial diamonds are used to achieve the desired results.
The mechanical polishing process is time-consuming as it involves multiple steps. It begins with a low grit level disc and requires multiple passes over the concrete surface. Gradually, higher grit discs are used until the desired finish is achieved.
While this method suits flat objects like concrete tables, stools, or coasters, it becomes more challenging when working with curved objects like planters. However, grinding accessories are available for tools like Dremels and Multi-tools that may be more suitable for working with curved objects.
Overall, diamond polishing for concrete crafts can be a complex project and may not be the most practical approach regarding convenience and efficiency.
Polish with a Concrete Polishing Substance
If your floor has a lot of stains or dullness, it may be necessary to purchase a concrete polisher.
Follow the instructions on the product label and apply the polisher using a mop or cloth. It's important to work on small sections at a time.
Begin from one corner and gradually work towards the opposite corner, ensuring you cover all areas evenly. This approach will help you achieve a consistent and glossy finish. If you attempt to cover a large area at once, the polishing substance may leave the surface looking hazy and lacklustre.
To maintain the shine and smoothness, it is recommended to repeat this process every two months. By doing so, you can preserve the attractive appearance of your floor.
Using Concrete Sealers for a Shiny Effect
Acrylic sealers are available in different finishes, such as matte, satin, and glossy. However, it's important to note that a concrete sealer can only achieve a certain level of sheen. For example, applying a high gloss sealer to a matte concrete or cement surface will create a sheen but won't achieve the same level of shine as epoxy treatments or polished concrete.
While the sealer can enhance the appearance of the surface and provide a sheen, it won't replicate the exceptional shine and glossy finish that can be achieved through epoxy treatments or the polished concrete look.
Clean it with a Pressure Washer.
To remove a heavy layer of dust from an outdoor concrete surface, you can utilize a pressure washer for cleaning. However, before proceeding, it is crucial to test the pressure washer on a small area of the concrete surface to ensure that it can withstand the high pressure of the water without causing any damage.
Using the pressure washer, you can clean the outdoor concrete area approximately once every two months. This regular cleaning routine will effectively eliminate dirt and grime, restoring the appearance of the space and giving it a refreshed look.
How to Make Concrete the Smoothest
Certain essential steps need to be followed to achieve the desired results when finishing concrete, regardless of the desired finish type.
To achieve the smoothest possible finish, you must adhere to specific guidelines and procedures.
Step 1: Even Out the Concrete
It is essential to check the concrete's levelness after it has been poured. Screed boards and darbys are standard tools for smoothing out newly poured concrete.
A flat board or aluminium screed board is used to smooth the surface of the wet concrete. The screed board is moved across the surface to fill in any holes, level the concrete, and remove any excess. The use of an abrasive can further polish the concrete.
Darbys, which look like small trowels but have an extended, narrow strip and two handles, are recommended for use on smooth surfaces because they leave no marks when used properly. The darby must be held level and rotated in an arcing motion.
These smoothing procedures must be carried out before the "bleed water," or excess water in the concrete, rises to the surface.
Step 2: Observe The Water Bleeding Off.
After finishing the concrete's smoothing and levelling process, the bleed water must be allowed to rise to the surface. The amount of time it takes for the bleed water to evaporate is subject to the type of concrete used and the surrounding temperature and humidity.
Do not rush into anything until all of the bleeding water has evaporated. Dusting, scaling, and delamination are foreseeable problems that can be avoided if this is done. Giving the concrete enough time to dry and letting the bleed water evaporate can also improve the surface's longevity and stability.
Step 3: Concrete Should Be Floated
Achieving a uniform and smooth surface in concrete requires floating the material. After the concrete has been levelled with a screed or darby, the next step is to float it to smooth out any rough spots, get rid of any imperfections, and make it as solid as possible. Floating can be done either by hand with a set of hand floats or with the help of a floating device.
You can use either small hand floats or large bull floats when floating on your hands. A simple magnesium hand float will do the trick for smaller areas. For larger areas, however, a bull float with larger wheels is recommended to ensure that the concrete's aggregates settle properly. This guarantees a more uniform and steady look all over the surface.
Step 4: Concrete With A Trowel
Smoothing and polishing the surface of interior concrete relies heavily on the use of a trowel. The appropriate tool for the job is a flooring trowel, finishing trowel, or float trowel.
Repeated, consecutive sweeps with a steel trowel are the secret to a flawless finish. Trowel pressure should be increased gradually as work continues. When applying mortar, keep your trowel level and avoid tilting it to prevent a textured finish called "chatter" that won't provide the desired smoothness.
It's important to remember that the concrete shouldn't get any wetter as the finishing process progresses. The surface's final appearance and durability may suffer if water is added during the curing process.
Jointing and Edging
Edging and jointing are two more crucial processes in completing concrete.
To edge a concrete slab, one must use a small hand trowel to cut sharp angles along the slab's perimeter. This process is important because it gives the concrete a more professional appearance.
When it comes to cracking caused by temperature shifts and shrinkage, jointing is essential. To prevent the concrete from cracking unattractively as it expands and contracts, joints are cut at regular intervals. These joints are typically made with a concrete jointer, which has a blade about a quarter the depth of the slab. You could also use a spacer or guide to cut grooves at regular intervals into the slab. Taking this measure helps guarantee the concrete's structural soundness and longevity.
Step 5: Let The Concrete Heal
Once you have finished the necessary steps to achieve the desired surface quality, it is important to allow the concrete to fully cure before polishing. Curing is when the concrete gains strength and stability through a chemical reaction.
The duration of the curing process can vary depending on factors such as the type of concrete, environmental conditions, and the thickness of the slab. Therefore, it is recommended to follow the guidelines provided by the concrete manufacturer or consult with a professional to determine the appropriate curing time.
Once the concrete is fully cured, you can begin polishing to achieve the desired level of smoothness, shine, and aesthetic appeal for your concrete surface.
Conclusion
Polished concrete floors are becoming increasingly popular due to their durability and longevity. To take care of them properly, it is important to know what it is, how it gets polished, and how to take care of it properly. Before the concrete cures, it needs to be levelled, floated, and troweled in the right way to get a smooth, shiny finish. The grinding process is conducted step-by-step, starting with a low-grit diamond pad and progressing to higher grits until the concrete achieves a brilliant polished shine. To achieve a uniform and smooth concrete finish, it is crucial to ensure proper levelling, troweling, and floating before curing.
Chemical or mechanical polishing techniques can be used to achieve the desired glossy and smooth finish. The most important details in this text are the steps needed to achieve a shiny concrete floor. To achieve a high-quality surface, it is necessary to perform levelling, floating, and troweling of the concrete before it undergoes curing. Regular washing with a soapy water solution is recommended to maintain the smoothness and shine of any concrete surface. Mechanical polishing is a time-consuming process that involves using grinding discs with metal bond diamonds, which are specifically designed for concrete surfaces.
Polishing with a concrete polishing substance is necessary if the floor has a lot of stains or dullness. Apply a concrete polisher using a mop or cloth and work on small sections at a time. Repeat this process every two months to maintain the shine and smoothness of the floor. Use acrylic sealers in different finishes to achieve a certain level of sheen. Clean the outdoor concrete area with a pressure washer once every two months to remove dirt and grime.
Follow the instructions on the product label and adhere to specific guidelines and procedures to achieve the desired results. The most important details in this text are the steps needed to smooth and level the surface of interior concrete. The screed board is used to fill in holes, level the concrete, and remove excess water. The bleed water must be allowed to evaporate, and the concrete should be floated to smooth out any rough spots and make it as solid as possible. A flooring trowel, finishing trowel, or float trowel is the appropriate tool for the job.
Repeated, consecutive sweeps with a steel trowel are the secret to a flawless finish. When applying mortar, keep the trowel level and avoid tilting it. Jointing and edging are two important processes in completing concrete. Edging is important to give the concrete a professional appearance and prevent cracking caused by temperature shifts and shrinkage. Jointing is made with a concrete jointer and grooves are cut at regular intervals. Once the concrete is fully cured, it can be polished to achieve the desired level of smoothness, shine, and aesthetic appeal.
Content Summary
- Polished concrete floors are increasingly popular in stores, hotels, and schools.
- Polished concrete is tougher and more durable than other flooring options.
- It requires less maintenance and lasts longer.
- Proper installation and care are crucial for polished concrete floors.
- Mechanical or chemical methods can be used to polish concrete to a shiny finish.
- Diamond-impregnated floor pads are used to grind and enhance the smoothness of concrete.
- Chemical hardeners can be applied to increase the durability of polished concrete.
- Levelling, floating, and troweling are necessary before curing to achieve a smooth finish.
- Regular cleaning with a mild soap and water solution helps maintain the smoothness and shine.
- Mechanical polishing techniques involve using grinding discs with metal bond diamonds.
- Different grit levels are used to gradually achieve the desired polished finish.
- Concrete polishers can be used for heavily stained or dull floors.
- Acrylic sealers can enhance the appearance of the surface but won't provide the same shine as polished concrete.
- Pressure washers can be used to clean outdoor concrete surfaces.
- Specific steps must be followed to achieve the smoothest possible concrete finish.
- Screed boards and darbys are used for levelling wet concrete.
- Allowing bleed water to evaporate before further work prevents potential problems.
- Floating the concrete helps smooth out rough spots and imperfections.
- Hand floats or bull floats can be used for floating depending on the area.
- Using a trowel is crucial for smoothing and polishing interior concrete.
- Consistent trowel sweeps with increasing pressure result in a flawless finish.
- Edging and jointing are important processes for a professional appearance and preventing cracks.
- Joints are created to allow for expansion and contraction of the concrete.
- Curing is necessary for the concrete to gain strength and stability.
- The duration of the curing process varies depending on factors such as concrete type and environmental conditions.
- Following manufacturer guidelines or consulting professionals is recommended for curing time.
- Full curing is necessary before starting the polishing process.
- Polishing achieves smoothness, shine, and aesthetic appeal for concrete surfaces.
- Polishing concrete can be a complex project requiring specific equipment and techniques.
- Regular maintenance and care are essential to preserve the attractive appearance of polished concrete.
Frequently Asked Questions
Use a 150-grit metal-bonded diamond for grinding (or finer if desired):
- Densify the concrete by applying a chemical hardener.
- Polish the surface using a resin-bonded diamond of 100 or 200 grit or a combination.
- Use a 400-grit resin-bonded diamond to polish the surface.
Expect to use more colour hardener to overcome the grey concrete, he says, when you are trying to achieve a lighter colour. Iannone notes titanium dioxide can also be used as a white pigment additive to make concrete whiter and brighter.
Concrete is a durable material, but now and then, a small chip or hole appears, making it look a little rough. But you can sand your concrete to return it to its former smooth glory. For example, sanding your concrete countertops and floors can polish and renew them, eliminating small stains, bumps, and pocks.
Vinegar does not dissolve concrete but can degrade the cement that binds it together. As a weak, dilute acid, vinegar will cause only minor damage to concrete but can take the shine off polished surfaces. It can, however, be used to remove small amounts of cement from tools.
Harsh detergents and cleaners commonly used for other types of flooring (such as Pine-Sol, bleach, and vinegar) are not the right pH and should not be used on concrete floors with a sealed surface.
